Renovations are being done both indoors and outdoors.
The Owners decided to replace the old style columns on the verandah.
Here the workmen are removing the old circular columns.
They hammered away at the old masonry and erected supports for the roof while replacing the columns.
They replaced the circular columns with rectangular ones. They also took the ornate curves out of the overhead. Here you can see the many temporary roof supports.
Here are the first columnrs they replaced by the front door.
As they started to replace the columns the new ones were encased in wood to hold the cement. See the middle column here.
They constantly hammered and chipped away at the old columns.
They removed the support for the columns down to the base.
Here is what the finished new columns look like at the front of the hoiuse.
Here are the columns at the side of the house. Noticed the gentle curve between columns instead of the ornate curves of the old system.

The work inside the house is very extensive. Every room is being remodeled.
The basic electrical wiring is being renewed also.
The work is ongoing for quite a while.
Here you can see the plastic under the roofing tiles.
All the walls are being resurfaced.
There is remodeling in every room.
As the work progresses there will be more photos in more posts.
Photos by Urso Branco
Welcome!
Powered by IP2Location.com
Vila Nicolina

May 25 2006
Subsequently she died and the new owners began a marvelous reconstruction/renovation of the Vila Nicolina. A few years later we rented a house across the corner from Vila Nicolina.
This blog is the story of that reconstruction, step by step, in photos.
Saturday, February 21, 2009
Changing The Vila - Renovations
Posted by
Urso Branco
at
12:16 PM
0
comments
![]()
Making a new sidewalk
The first thing they did was to "Build the Sidewalk". They cleaned out the old sidewalk, leveled the ground and then, square by square, using moulds they cast the sidewalk. They chose not to use tiles but rather to use concrete. They also started working on the Wall at the same time. See the posts about the Wall.
This is the sidewalk along the north side.D
This is the "front" sidewalk along the east side.
Later they planted trees.

In the spring the trees began to bloom.
This was just the start of the gardening. See more trees and flowers in the posts about the Grounds.
Photos by Urso Branco
Posted by
Urso Branco
at
12:12 PM
0
comments
![]()
The Wall - Tearing down the old
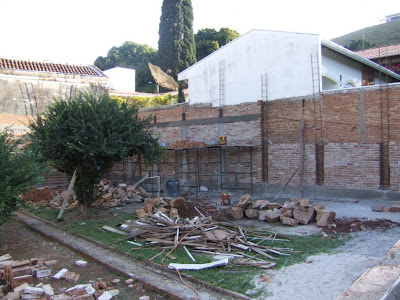
Now they could tear down the old wall and clean out the gardens. There was a shed against the back wall. That was also removed.
It took a long time to clean up the old mess.
They had gardens here but they were also removed.
They started to rebuild the wall while still cleaning out the trash.
The first step on the wall, because they removed the shed, was to make the wall stronger.
Even the low walls around the vila were rebuilt.
This whole project was a long project started in Aug 2007 and still there is a long way to go.
Photos by Urso Branco
Posted by
Urso Branco
at
12:08 PM
0
comments
![]()
The Wall - Building the new
In Brasil they love to build walls. Some walls show property lines and others, like this one are built for privacy. Here the crew of two start to double the thickness of the wall and then start to go higher. Unbelievably high! 
This wall was originally braced by a large shed at the base. They tore it down and had to reinforce the wall so they made it twice as thick with new vertical supports as can be seen here.
Then they started to build up from this point.
They went higher and higher. The question became "How high would the go?"
They went so high they had to put vertical bracing higher.
Then they parged the walls.
Here the guy parges the lower wall.
He puts a real good coat of cement and bonding agent on the wall.
They capped off the big wall and continued to parge it.
They had to keep it wet until they parged it all.


Here you see one of the workers parging the back side of the wall.
With the big walls done they started on the low perimeter walls. They tore down the old walls first.
The low perimeter walls are all removed.
Now they have started to rebuild the low perimeter walls.
They also built a new concrete power service pole and entrance way.![]()
Work continues on finishing the perimeter walls.

These perimeter walls went higher than the originals to provide privacy in the back yard.


They built a new gateway as seen from inside the wall.
These walls have now been parged.
Perging was completed inside the perimeter walls.

Now the walls are almost completed.
They continued to build walls to completely enclose the back yard.. Now will they paint or tile the finished project? Time will tell.
Photos by Urso Branco
Posted by
Urso Branco
at
12:01 PM
0
comments
![]()


